Schedule THEOlive channel start & stop
Define when a channel should be ready and when it should be stopped
THEOlive allows you to automatically schedule the start and stop of a channel, offering several key advantages:
- System readiness: All necessary components of the THEOlive stack will be up and running at the scheduled time.
- Lower development effort: No need to build and maintain your own scheduling system, saving time and reducing costs.
- Avoid wasted resources: Prevent unnecessary transcoding minutes by ensuring channels stop automatically when no longer needed.
How it works
What is a Scheduler in THEOlive?
A scheduler is a configuration that includes a start time, an optional end time, and a list of channels to start and stop automatically at those times.
- End time is optional: If you don’t specify one, you’ll need to manually terminate the scheduler. This can be useful if you're unsure when your event will end.
How Scheduled Start Works
15 minutes before the scheduled start time, the associated channels enter a scheduled state. During this period:
- The entire THEOlive stack begins spinning up.
- The THEOlive player will show no content—just as if the channel were in a stopped state.
Start times under 15 minutes: You can create a scheduler with a start time less than 15 minutes in the future or even immediately by omitting the start property in the API. While the channels will still attempt to go live, THEOlive cannot guarantee the stream will be ready exactly on time due to infrastructure startup time.
At the scheduled start time, the channel switches to playing mode and begins streaming to viewers.
At the end time (or if the scheduler is manually terminated) the channel will stop.
Post-stream Usage Report
Approximately 15 minutes after the scheduler ends, THEOlive generates a usage report. This report includes:
- Seconds viewed per channel
- Channel alias
- Viewer data by country
- Viewer platform data (OS, browser, versions, etc.)
- And more detailed insights
Creating and managing a scheduler through the API
Setting up a schedule via the THEOlive API is quick and straightforward. For full implementation details, refer to the Create scheduler API documentation.
- Updating a scheduler: You can modify a scheduler at any time before or during its active period.
- Manual termination: If your events ends early or you didn't set an end time, you can manually stop the scheduler using the Terminate scheduler endpoint.
- Deleting a scheduler: If the scheduler hasn’t started yet, it can be removed using the Delete scheduler endpoint.
- Accessing usage reports: About 15 minutes after a scheduler has ended or been terminated, a detailed report becomes available via the Get scheduler report endpoint.
Scheduler management in the console
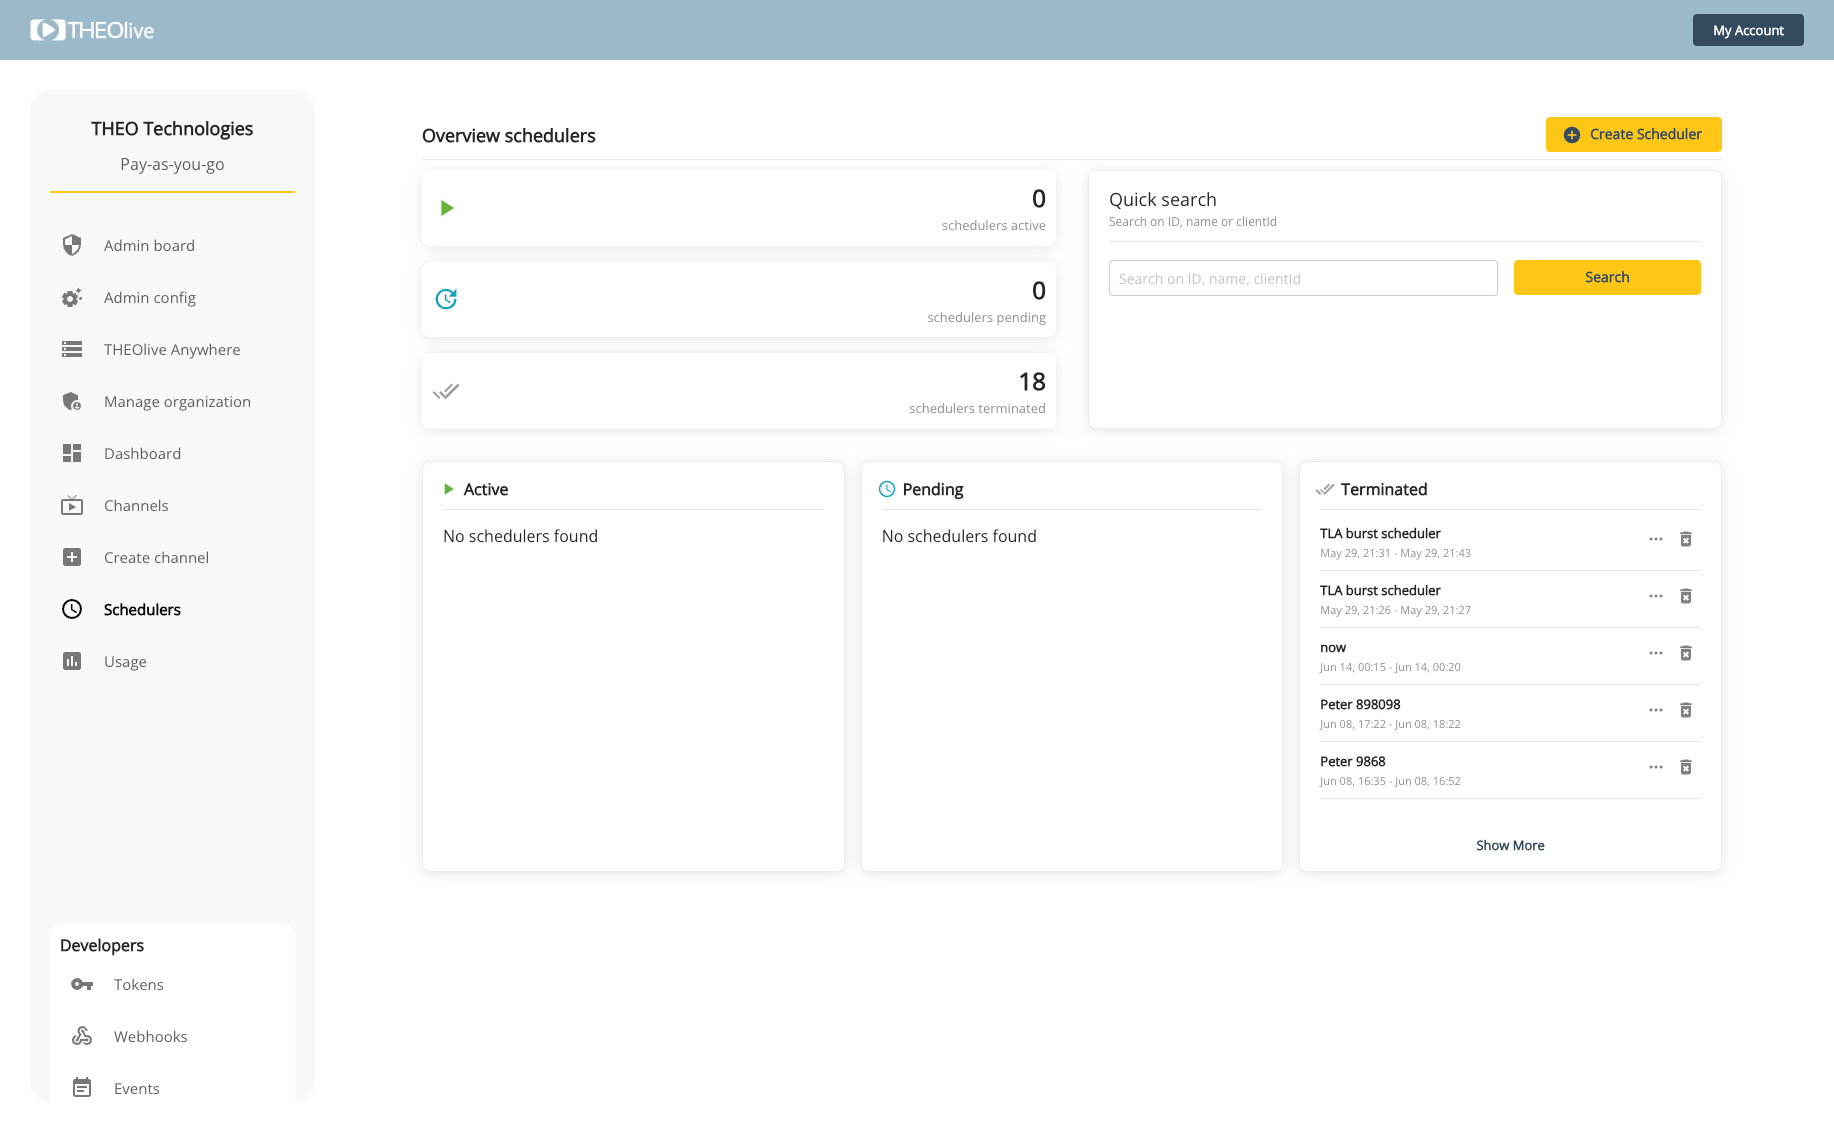
You can view the status of all schedulers at any time, including those that are active, pending, or terminated.
Active schedulers cannot be deleted.

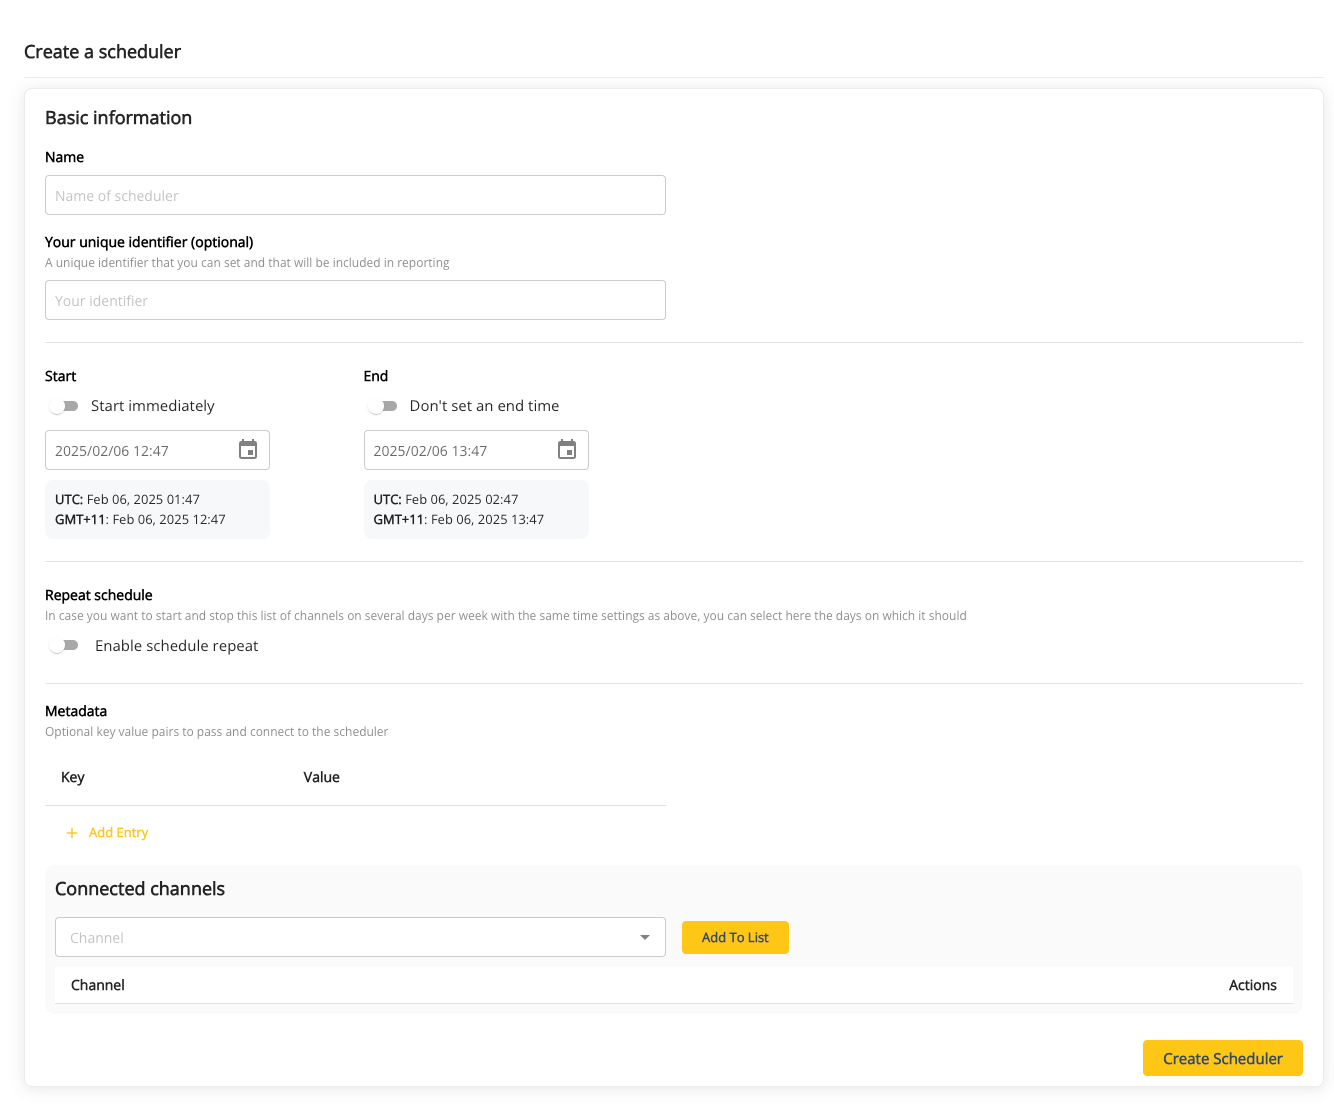
When creating a new or managing an existing scheduler, you can pass a name, start and (optional) end date, and select the channels that are part of this scheduler and should start and stop at the given timestamps.
As a user, you can also pass an optional Client ID, which is an ID you can use for your reference. You can also pass a metadata object, which consists of key-value pairs.
When creating a new scheduler or managing an existing one, you can specify the following:
- Name: A custom name for the scheduler.
- Start and End Dates: Define the start time, and optionally, the end time.
- Channels: Select the channels that will be part of this scheduler, specifying which should start and stop at the defined times.
- Repeat schedule: Allow the specified schedule to be repeated based on settings.
In addition, you can include the following optional fields as a user:
- Client ID: A unique identifier for your reference.
- Metadata Object: A set of key-value pairs that you can use to store additional custom information.
